Want an effortless yet effective exercise that uses no equipment and works many muscles at once? Look no further than the pelvic curl! It is both an underappreciated and simple exercise that strengthens muscles, improves posture, and tones the lower body and core.
As with many exercises, pelvic curl goes by multiple names, including bridge pose from yoga and glute bridge from fitness areas. It can be categorized under dynamic and low impact movements that require the coordination of glutes, hamstrings, the lower back, and deep core muscles, all working together.
Reason Why Pelvic Curl Is A 3-in-1 Workout

- Glutes: The gluteus all three of them – maximus, medius, and minimus – are extensively utilized in this exercise as they help in lifting your hips and in sculpting and strengthening your back side.
- Abs & Core: Toning your midsection, your obliques and transverse abdominis work to stabilize your spine and pelvis as you raise and lower your pelvis.
- Legs: Shown to develop lean leg strength, your quadriceps and hamstrings aid in the movement, particularly during the lift and the slow lower.
- Bonus: The pelvic curl benefits all fitness levels and additionally enhances pelvic floor function, reduces lower back pain, and improves hip mobility.
How to Do the Pelvic Curl (Step-by-Step)
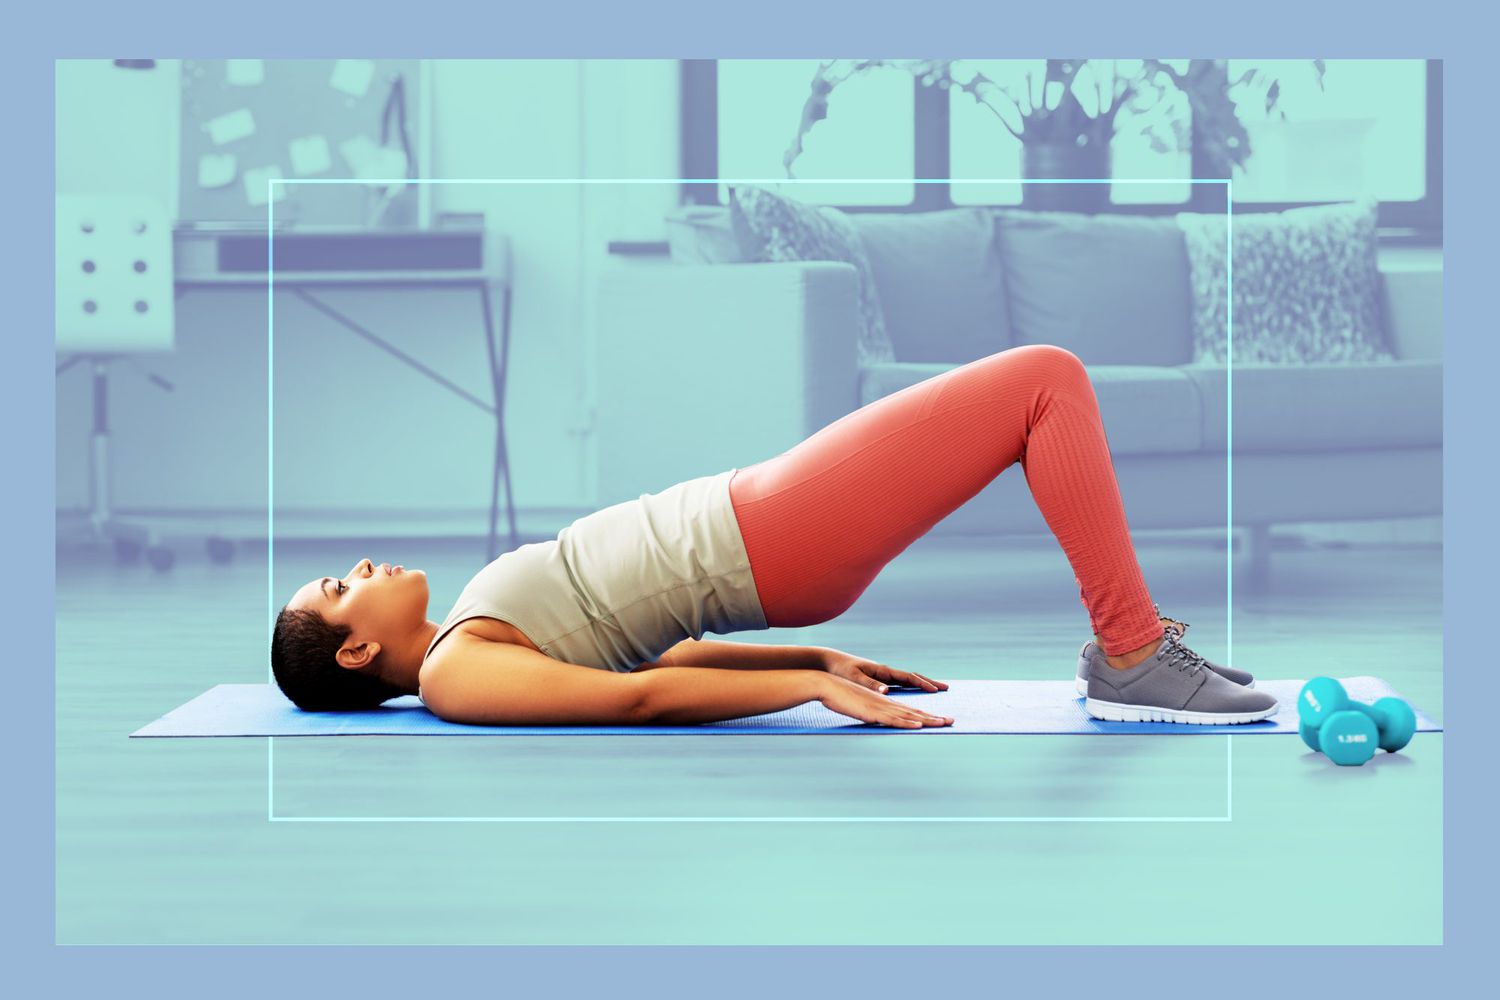
1. Starting Position
Lie on your back with your knees bent and your feet flat on the floor, hip-width apart. Your arms should relax at your sides with palms down. Draw your belly button towards your spine to engage your core. Keep your neck long and your back in a neutral line.

2. The Lift
Press down through your heels and squeeze your glutes to roll your hips toward the ceiling. Lift your spine off the floor, one vertebra at a time, until your shoulders and knees form a straight line. Keep your lower back straight and avoid pushing your belly forward—let your glutes do the work.

3. The Hold
When you reach the top, squeeze your glutes as tight as you can for 1 to 2 seconds. Hold your core tight and make sure your hips don’t drop down or push too high—stay level.

4. The Lower

Reverse the movement by lowering your spine to the floor one vertebra at a time. Keep it slow and steady. Return to the starting position and get ready to do it again.
Complete 2 to 3 sets of 12 to 15 reps.
Pro Tips for Maximum Results
- Mind-Muscle Connection: Clearly picture “press through the heels” and “squeeze the glutes” for extra power.
- Breathing: Breathe in while you lower your hips. Breathe out as you lift.
- Avoid Common Mistakes: Watch out for hips sagging or lifting way up: both can wreck your lower back. Keep your chin slightly tucked to prevent neck strain.
Advanced Variations
When you can nail the basic pelvic curl, step up your game with these:
- Single-Leg Glute Bridge: Keep one leg extended in the air while curling. Your glutes will be on fire!
- Weighted Bridge: Add a dumbbell or a barbell across your hips for a tougher burn.
- Marching Bridge: At the top of the bridge, lift one foot, and then the other like you’re marching.
- Pulse Bridge: At the top, add quick up-and-down mini lifts to keep your glutes working even harder.

Who Should Do It?
- Beginners who want a simple, safe start in strength training.
- Office workers fighting tight hips and floppy glutes.
- New moms gently rebuilding core and pelvic floor strength.
- Athletes looking to pump up their backside power.
Final Thoughts
Don’t let the pelvic curl’s low-key look fool you. This move packs a serious punch. It helps you sit and stand straighter, builds a stronger backside, tightens your abs, strengthens your legs, and keeps your spine happy—what’s not to love? Drop this 3-in-1 wonder into your daily flow, and give it a few weeks. You’ll feel a perkier rear, a more switched-on core, and legs that feel tougher. No weights? No worries. Just grab a mat and your body—you’re set. So, start your journey to a sleeker, stronger you, one pelvic lift at a time.