Next time you’re in a yoga studio, you may feel you’re not as “bendy” as everyone else. But that’s fine. Yoga is about feeling comfortable and pushing yourself just a touch. If it hurts, you’re doing it wrong. Finding ways to make yourself feel better while partaking in exercise designed to make yourself feel better is absolutely fine.
Yoga teacher Jessamyn Stanley, author of Every Body Yoga, shows us 10 easy ways beginners can adjust common yoga poses. You’ll need one or two blocks or a blanket for most of these moves.
The 10 Poses and Their Modifications
1 – Cobra Pose (Bhujangasana)

How to do the modification (Baby Cobra):
This version lets you ease into the backbend, building strength and flexibility in your back gradually.
- Start lying face-down on the mat, legs hip-width apart.
- Place your palms on the mat next to your ribs, with elbows tucked in toward your body.
- On an inhale, draw your shoulder blades down your back and pull your chest forward.
- You should be able to lift your hands off the mat, feeling most of the effort in your upper back, core, and legs. Keep your elbows bent and gaze forward.
When you’re ready (Full Cobra):
-
- From Baby Cobra, press your palms firmly into the mat.
- Lift your head and chest, drawing your ribs and belly away from the mat.
- Keep a slight bend in your elbows and roll the shoulder blades back and down.
- Lift your heart and gaze upward.
2 – Bound Angle Pose (Baddha Konasana)

How to do the modification:
Giving your thighs extra support with blocks allows them to relax and melt into the stretch, making it far less taxing.
- From a sitting position, bend your knees and bring the soles of your feet together, heels close to your pelvis.
- Take two blocks and slide one under each knee for support.
- Grab your big toes. Press your elbows into your inner thighs to gently draw your torso forward.
- Try not to round your spine as you fold. Stay for several breaths.
When you’re ready:
-
- Remove the blocks. Instead, use your elbows as anchor weights for your legs.
- You can sink deeper by drawing your head to the floor and your belly to your feet, while pressing your sit bones into the mat.
3 – Downward-Facing Dog (Adho Mukha Svanasana)
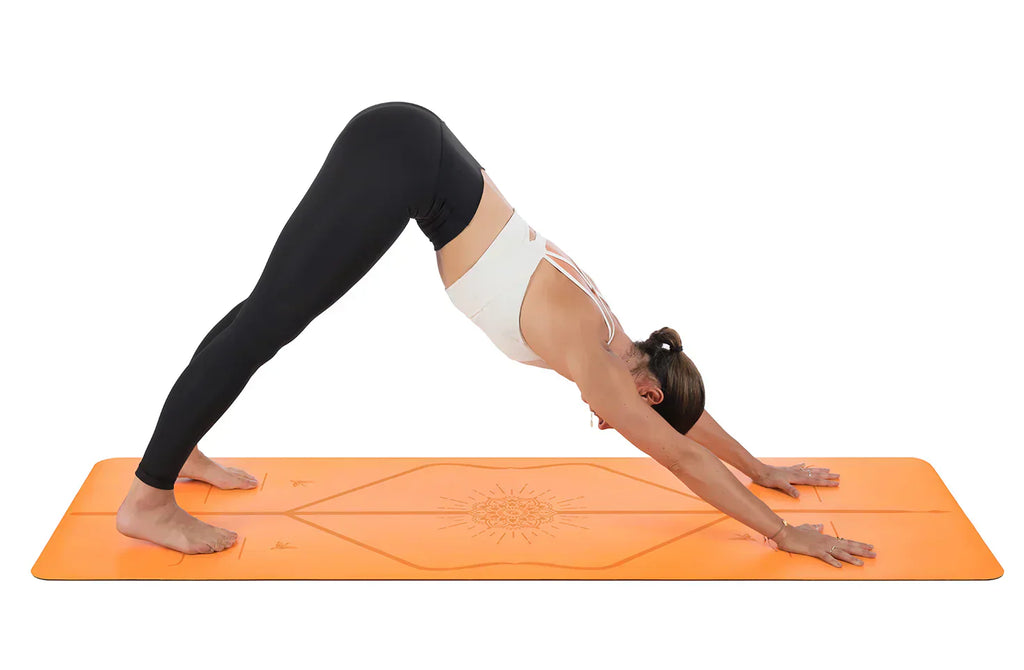
How to do the modification:
Using blocks under your hands reduces the angle of the pose, which is excellent for people with tight shoulders or weak wrists.
- Start on all fours. Place your hands on blocks (at any height) in front of your shoulders.
- Curl your toes under, and lift your hips up and then back, forming an inverted “V”.
- Use the blocks as a weight stabilizer. Keep a slight bend in your knees if necessary.
- Work toward straightening your legs and easing your heels to the mat by shooting your hips up and back.
When you’re ready:
-
- Remove the blocks and place your hands on the mat.
- To protect your wrists, claw the mat by pressing into your fingertips and knuckles to create a “suction cup” with your hands.
4 – Garland Pose (Malasana)

How to do the modification:
If your hips are tight or you have tender ankles or knees, using a block and blanket makes this deep squat accessible.
- Start standing with your feet just wider than your hips. If your heels lift, slide a folded blanket under them.
- Spin your heels inward and toes out, then sink your hips down into a deep squat.
- Slide a block under your butt for support. You can turn the block to any of its three heights; the taller the height, the easier the pose.
- Place your elbows on your inner thighs and press your palms together.
When you’re ready:
-
- Remove the blanket, block, or both to sink into the deepest form of this pose.
- Stay for a few breaths.
5 – Warrior III (Virabhadrasana III)
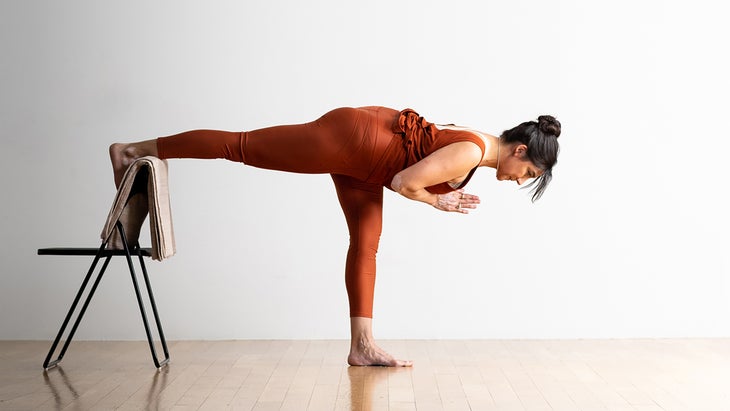
How to do the modification:
This pose is a test of balance. Using blocks provides stability as you build strength in your standing leg and core.
- Place two blocks (at any height) about 8 inches in front of your toes.
- Step your right foot forward between the blocks.
- Shift your weight onto your right foot and kick your left foot straight up and back until it’s parallel with the floor.
- Rest your hands on the blocks for balance, but don’t let all your weight fall into them.
- Repeat on the other leg.
When you’re ready:
-
- When you feel steady, remove the blocks.
- Press your palms together in front of your chest or extend your arms straight back like airplane wings.
6 – High Plank (Utthita Chaturanga Dandasana)
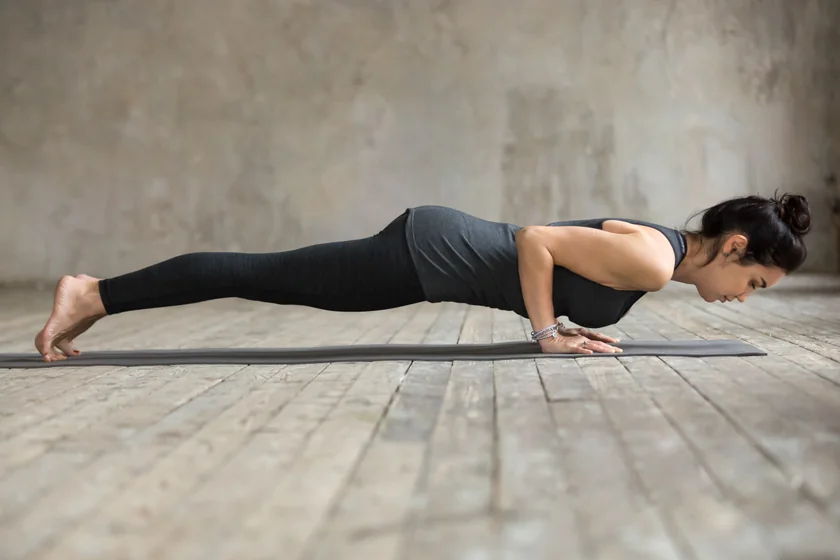
How to do the modification:
Before building up to a high plank, master the Tabletop Pose to understand weight distribution and core engagement without straining your wrists.
- Start on all fours with your shoulders stacked directly over your wrists and your hips directly over your knees.
- Spread your fingers wide to distribute your weight evenly in your hands.
- Engage your triceps, release tension in your neck, and gaze just beyond your fingertips.
- Practice pushing the ground away and rounding your upper back slightly to feel sturdy.
When you’re ready:
-
- From Tabletop, curl your toes under and slowly step your legs straight back into a high plank.
- Stay on the balls of your feet, keeping your core lifted and shoulders engaged.
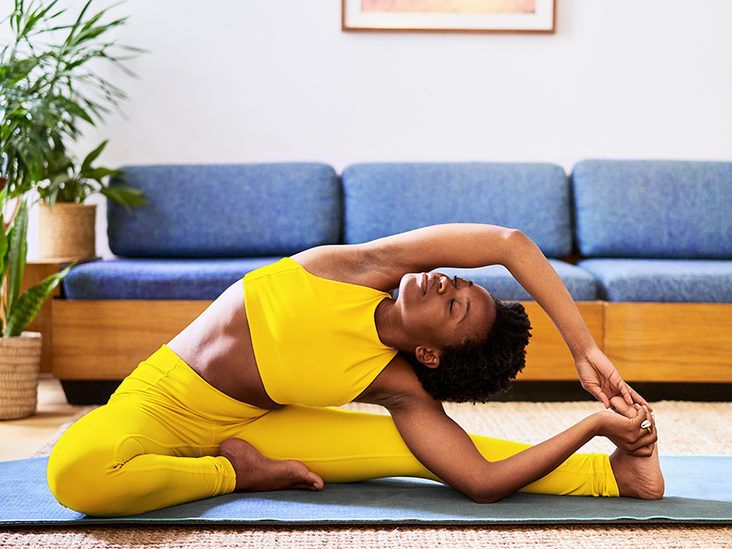
7 – One-Legged King Pigeon Pose (Eka Pada Rajakapotasana)
How to do the modification:
This is a deep hip stretch. A block under your hip provides support and keeps your hips square, preventing you from rolling to one side.
- Start in a high plank position. Draw your right knee to your right hand and your right foot toward your left hand.
- Rest the outside of your shin on the mat. Try to get your shin as parallel as possible to the short edge of the mat.
- Grab a block and place it under your right hip for support. This keeps your hips square.
- Sit upright, or fold forward over your front leg and relax your forehead on the mat.
When you’re ready:
-
- As your hips open over time, remove the block.
- Try sliding your front foot farther forward to keep your shin parallel with the front of the mat.
8 – Standing Half-Forward Fold (Ardha Uttanasana)
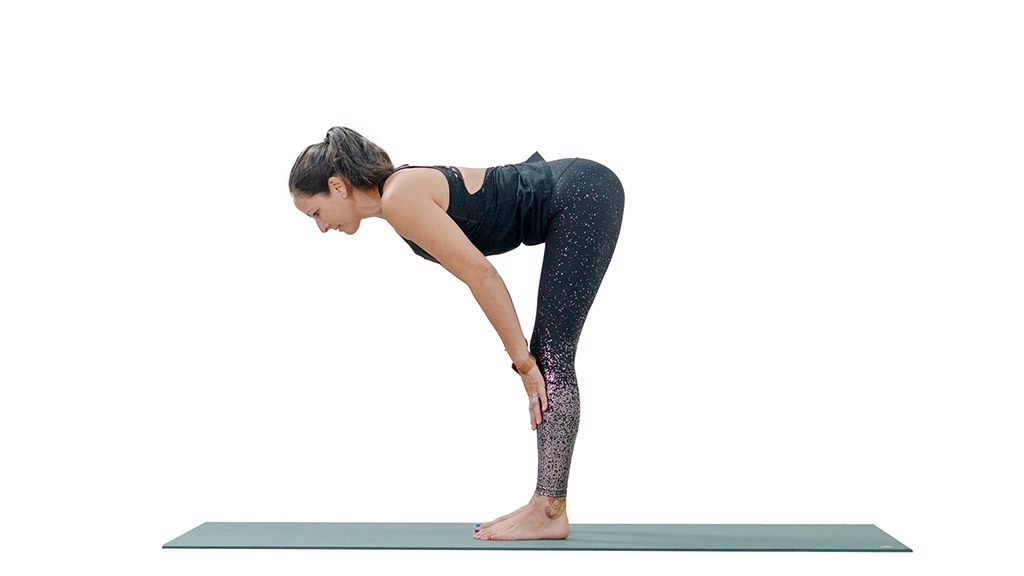
How to do the modification:
This modification allows you to get a great stretch in your hamstrings and back without needing to reach the floor.
- Start standing with your feet hip-width apart.
- Place two blocks (at any height) about 8 inches in front of your toes.
- Exhale as you fold forward from your hips and place your hands on the blocks.
- Extend your spine, chest, and gaze forward, creating a “flat back” shape.
- Push into the blocks to lengthen your spine and release tension.
When you’re ready:
-
- Remove the blocks.
- Reach your fingertips to the mat (or your shins) as you draw your heart forward, maintaining a long, flat spine.
9 – Tree Pose (Vrksasana)
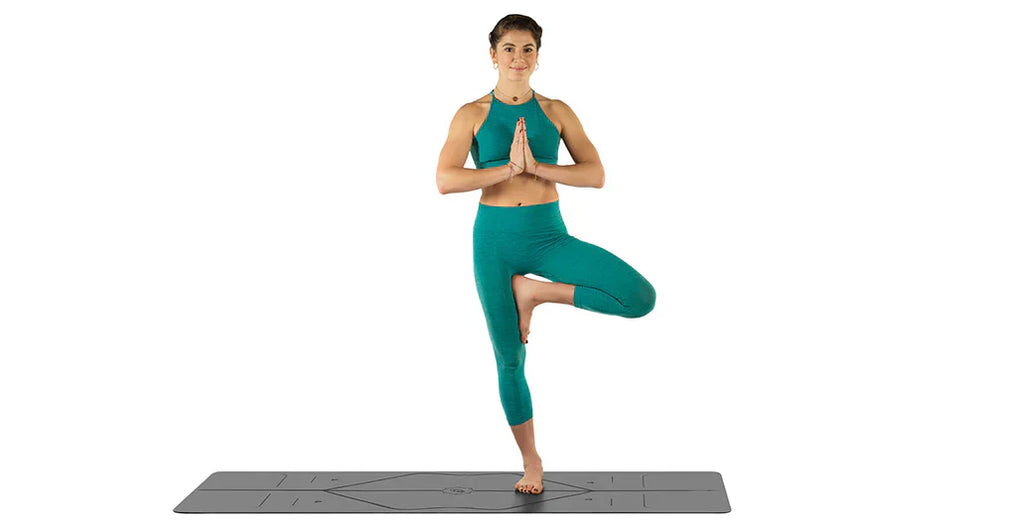
How to do the modification:
A block gives you a stable spot to rest your foot, helping you work on balance without worrying about lifting your foot high.
- Start standing. Shift your weight to your left leg.
- Place a block (at any height) on the inside of your left ankle.
- Lift your right foot, bend the knee, and turn it out from the hip.
- Rest the toes of your right foot on the block, with your right heel resting on your inner left ankle (like a kickstand).
- Stand tall and bring your palms to touch in front of your heart. Repeat on the other side.
When you’re ready:
-
- Remove the block. Lift your right foot to your left ankle, mid-shin, or (if flexible) your upper inner thigh.
- Pro tip: Never rest your foot directly on your knee joint.
10 – Half Moon Pose (Ardha Chandrasana)

How to do the modification:
This is a very tricky balance pose. A block under your hand brings the floor “closer” to you, providing crucial stability.
- From a standing position, place a block about 8 inches in front of your right toes.
- Shift your weight into your right leg and lean to the right, resting your right hand on the block.
- Lift your left leg straight up until it’s parallel to the floor, flexing the foot.
- Extend your left hand toward the ceiling, opening your chest to the side.
- Repeat on the other side.
When you’re ready:
-
- Remove the block and reach your fingertips or palm all the way to the mat.
- Try to look up along your raised arm if your balance allows.
A Note on Using Props
If no one else at your group session has a block or a cushion, it can feel awkward or even embarrassing to use one. But those worries are all in your head. Even yoga teachers like Jessamyn Stanley use props.
“Personally, I used to always look down on using props because I felt like, ‘Oh, I’m not good enough,'” says Stanley. “But then I realized that’s just my ego getting in the way. And the ego is something you’re trying to walk away from anyway.”
“If you are using a block, that’s not a sign of weakness,” confirms Stanley, “it’s actually a sign of power—that you know that your body just needs to be a little bit longer, just needs a little bit of stabilizing, and when you’re using the props, you’re actually giving yourself even more reinforcement.”
Yoga can feel like a lot to get to grips with. However, there are plenty of approaches and levels of difficulty. If you try and push yourself too far too quickly, you won’t see the benefits. So ease yourself in with these methods, and don’t be embarrassed by using a block or blanket.